HOW TO SETUP GOOGLE ANALYTICS TO YOUR SHOPIFY STORE IN 6 EASY STEPS!

Google Analytics is a helpful free app provided by Google which helps you track and monitor the data of your website. If you have a Shopify store you most definitely should connect Google Analytics to it to have a better idea of your date and traffic. Do not know how to set up Google Analytics with your Shopify store? Do not worry at all as we have a step by step guide on how to set up Google Analytics with your Shopify store! Read away!
HOW TO SETUP GOOGLE SEARCH CONSOLE TO SHOPIFY STORE IN 5 EASY STEPS
STEP 1: CREATE GOOGLE ANALYTICS ACCOUNT
The first step in connecting Google Analytics with your Shopify store is to have an account. Visit the Google Analytics website and create an account with your work email or you can also sign in with your Google account.

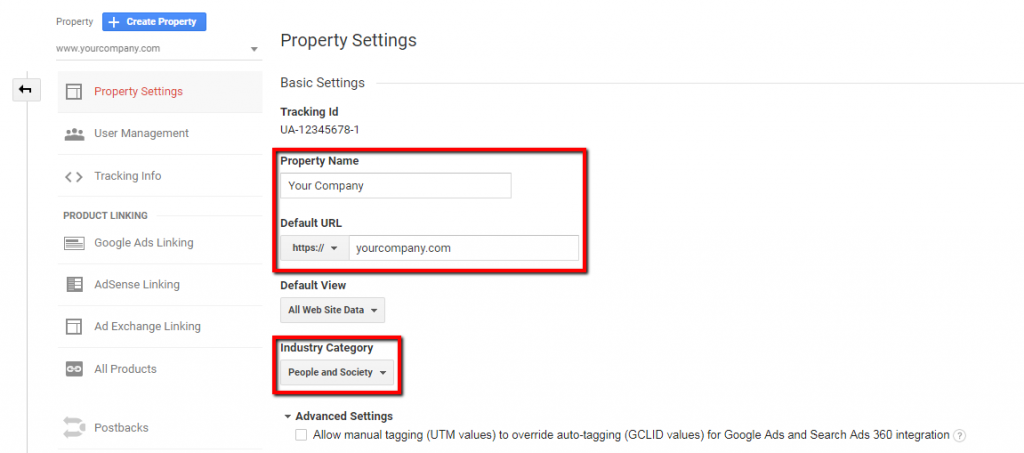
STEP 2: ADD A NEW PROPERTY
The next step is to create a new property for your Shopify store. For this you need to go to the “Admin” section of your Google Analytics account and click “Create Property” and then click on “Website”. Following this you will be asked to enter your Shopify store’s URL, name and industry category. It will also ask for your time zone and currency.
STEP 3: GET YOUR GOOGLE ANALYTICS TRACKING CODE
You will now be directed to a screen where you will be able to retrieve your Google Analytics Tracking ID. proceed to copy the code given on the screen as you will need this code to verify your website to monitor the data of your online ecommerce business.
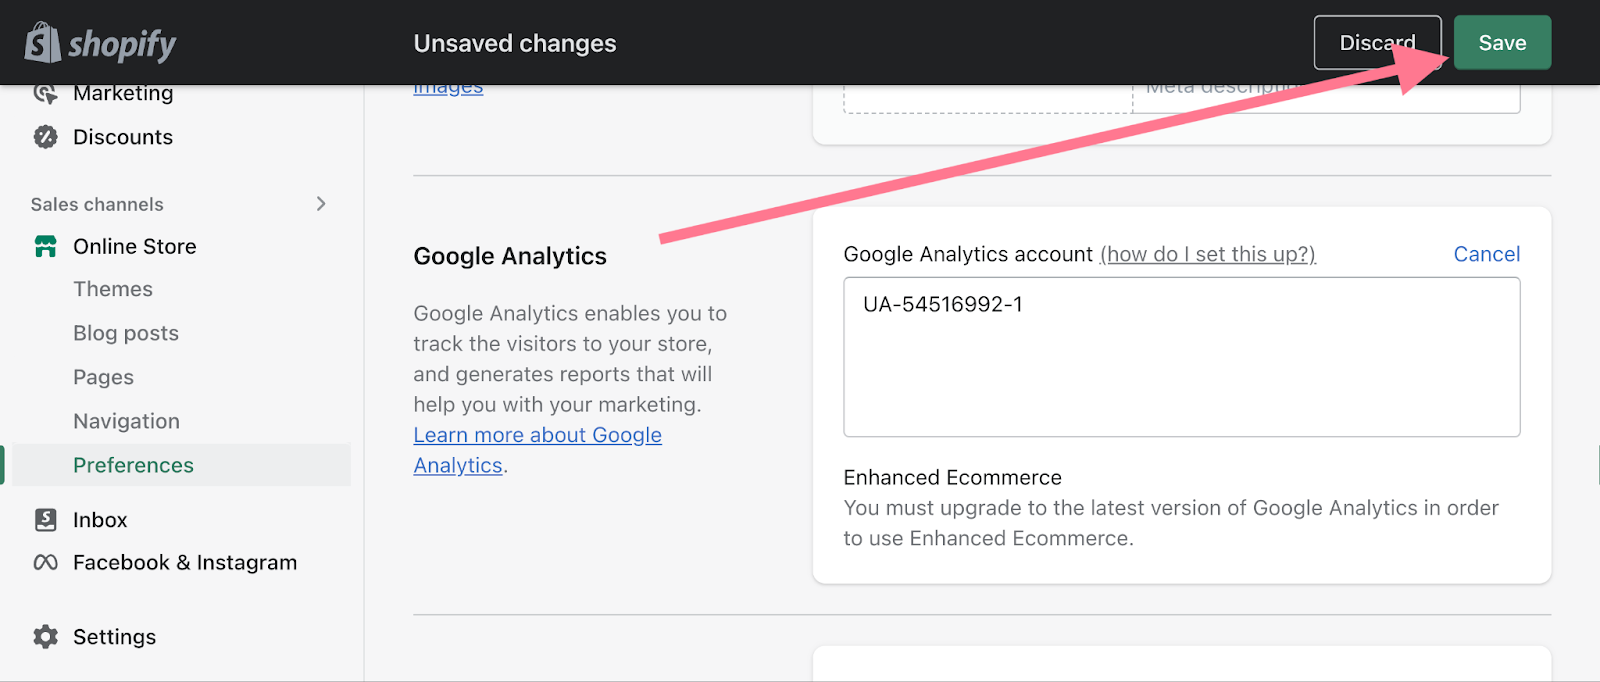
STEP 4: ENTER YOUR GOOGLE ANALYTICS TRACKING CODE
Head to your Shopify store and login to your Shopify dashboard. Click on “Online Store”>”Preferences”>”Google Analytics”. You will now see a section called “Google Analytics Account ID”. Proceed to paste the tracking code that you had copied in the previous step in this given field and continue by clicking “Save”.
![]()
STEP 5: VERIFY YOUR TRACKING CODE
You need to make sure your tracking code is working properly. Head back to Google Analytics and click on the “Real Time” tab. Now open your Shopify store and navigate through your site. By now the traffic and events should appear in real time reports. This would verify your tracking code.
Another way of verifying your setup is to head back to your Google Analytics account and search for the tracking status of the “Receiving Data”. This might be time taking like a few hours but once you see it you can be assured that Google Analytics is correctly tracking data from your Shopify store.
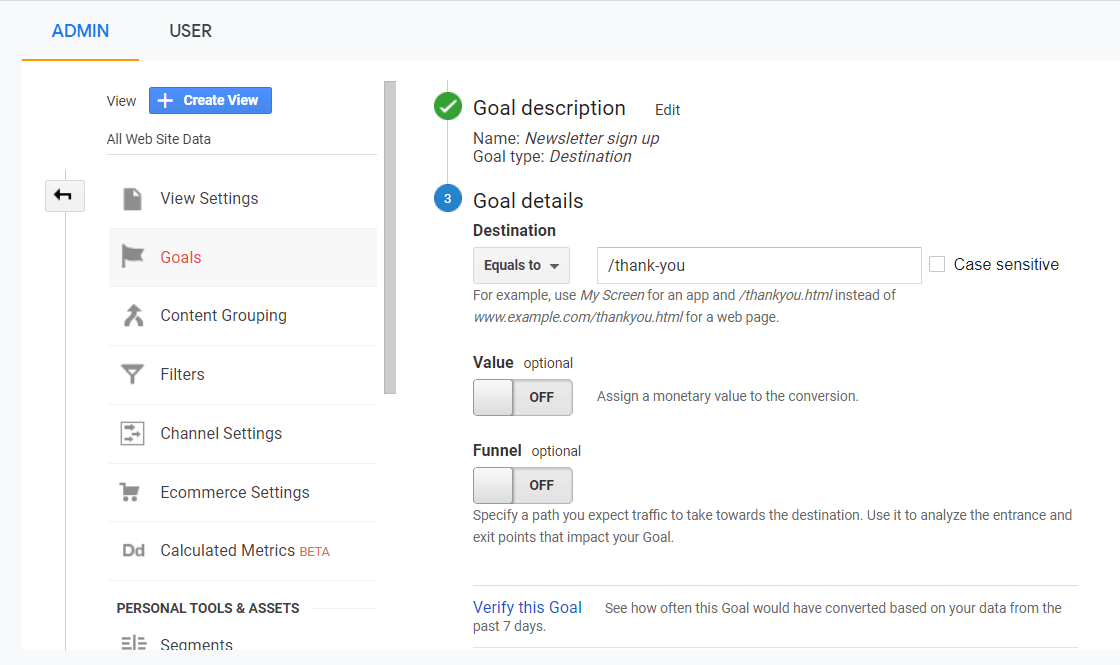
STEP 6: SET UP GOALS
You have now finally set up your Google Analytics with your Shopify store. Now is the time to set up some goals so that you can monitor the data in a systematic and regular way. Setting up goals and conversions will help you track specific actions like if a customer has bought something or subscribed to a newsletter. For setting up such goals go to the “Admin” section in Google Analytics, select your Shopify store’s property and click on “Goals”.
In conclusion, Google Analytics helps you keep a track of your date in a more systematic way. It yields you valuable insights about your store’s performance. By having a correct idea about your website’s traffic, customer response and behavior and sales you will be able to make more data driven and informed decisions about your online ecommerce business. It will help you understand the needs of your customers well and in no time you will be ahead of your competition!
Leave a Reply